Did you know that fly tying is not only a beloved pastime for anglers, but also an art form that requires a well-organized and efficient workspace?
In this article, we will explore the essential elements of creating a functional and organized fly tying workspace.
From selecting the right location to optimizing your tools and materials, we will guide you through the process of setting up a workspace that enhances your tying experience.
Choosing the Right Location
When choosing the right location for your fly tying workspace, consider a well-lit and quiet area with ample table space and storage options. Location flexibility is crucial for accommodating various projects and working preferences. Opt for creative solutions such as setting up in a spare room, garage, or even a corner of the living room.
A compact workspace with mobile options can be advantageous, especially for fly tyers who travel or have limited space. Look for furniture and storage solutions that are versatile and easily movable to adapt to different locations or to clear space when needed. Additionally, a well-organized and portable setup allows for easy transition between indoor and outdoor tying, catering to different tying environments and moods.
Once the location is determined, the next step is to equip the space with essential tools and materials, ensuring efficiency and convenience in the fly tying process.
Essential Tools and Materials
What essential tools and materials are necessary for an efficient fly tying workspace?
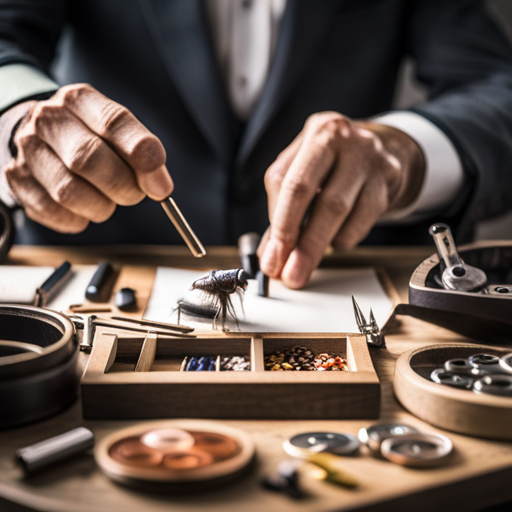
When setting up a fly tying workspace, having the right tools and materials is imperative for creating quality flies. Here are five essential items that every fly tying enthusiast should have:
-
Vise: A good quality vise is crucial for securely holding the hook while tying the fly. Look for a vise that is adjustable and can accommodate various hook sizes.
-
Bobbin: A bobbin is used to hold the spool of tying thread and allows for smooth and consistent thread tension while tying the fly.
-
Scissors: High-quality, sharp scissors are essential for cutting materials such as feathers, threads, and wires with precision.
-
Materials: Selecting a variety of high-quality materials such as feathers, furs, threads, and beads is essential for creating diverse and effective fly patterns.
-
Tool Maintenance Kit: Keeping your tools clean and in good condition is crucial for efficient and enjoyable fly tying. A tool maintenance kit should include items such as a hook sharpener, lubricant, and cleaning brushes to ensure that your tools remain in top shape.
When it comes to material selection, it’s important to consider factors such as the intended fish species, water conditions, and the desired fly pattern. By investing in these essential tools and materials and maintaining them properly, fly tying enthusiasts can ensure a productive and enjoyable tying experience.
Effective Storage Solutions
An efficient fly tying workspace’s organization can be further enhanced with effective storage solutions for the essential tools and materials mentioned earlier.
When it comes to storage solutions, space saving is key. Utilizing wall-mounted pegboards, shelves, and stackable containers can help maximize space and keep your fly tying area tidy.
Pegboards allow easy access to frequently used tools such as scissors, bobbins, and hackle pliers while keeping them off the work surface.
Shelves are useful for storing materials such as feathers, fur, and hooks in labeled containers, making it easier to locate specific items during the tying process.
Additionally, stackable and compartmentalized container systems provide an organized way to store beads, threads, and other small materials, minimizing clutter.
To further enhance organization, consider using clear containers or labeling systems to quickly identify contents.
Ergonomic Workspace Setup
When setting up a fly tying workspace, it’s crucial to prioritize ergonomic considerations for long-term comfort and productivity. This involves investing in a comfortable chair and desk that provide adequate support and promote good posture.
Additionally, proper lighting placement is essential to reduce eye strain and ensure clear visibility while tying flies.
Comfortable Chair and Desk
A comfortable and adjustable chair and desk are essential for creating an ergonomic workspace setup when building a fly tying workspace. When considering the setup of your fly tying area, it’s crucial to prioritize your comfort and physical well-being.
Here are five key elements to consider for your ergonomic seating and adjustable desk height:
-
Ergonomic Chair: Invest in a chair with proper lumbar support and adjustable armrests to maintain good posture.
-
Adjustable Desk Height: A desk that allows you to customize the height will ensure optimal positioning for tying flies without straining your back or shoulders.
-
Footrest: Incorporating a footrest can help with posture and reduce pressure on your lower back.
-
Desk Space: Ensure your desk provides ample space for your fly tying tools and materials, allowing for easy access and organization.
-
Lighting: Proper lighting is essential to reduce eye strain and maintain focus during long tying sessions.
Creating a comfortable and ergonomic workspace will enhance your fly tying experience and support your overall well-being.
Proper Lighting Placement
Proper lighting placement plays a crucial role in creating an ergonomic workspace setup for fly tying, ensuring reduced eye strain and enhanced focus during tying sessions. When setting up your fly tying area, consider both light intensity and fixture types.
Natural light is ideal, but if that’s not possible, opt for LED lights with adjustable brightness. Position the light source to reduce shadows and glare, using adjustable fixtures or overhead lighting to achieve the right angles. This helps to minimize eye strain and allows for better visibility of materials.
Additionally, consider using a combination of ambient and task lighting to create a well-lit workspace. By carefully arranging your lighting, you can significantly reduce potential discomfort and improve your tying experience.
Now, let’s transition into organizing your tying area.
Organizing Your Tying Area
Once you have gathered all your fly tying materials and tools, it is essential to set up an organized and efficient workspace. Maximizing space and implementing efficient organization techniques will not only streamline your workflow but also enhance your overall tying experience. Here are some tips for organizing your tying area:
- Workspace layout: Arrange your materials in a way that maximizes your available space and allows for easy access to frequently used tools.
- Tool storage: Utilize organizers, bins, or drawers to keep your tools sorted and easily accessible.
- Material organization: Categorize your materials by type and store them in clear containers or labeled bags for quick identification.
- Clutter management: Regularly declutter your workspace to maintain a tidy and efficient tying area.
- Workspace personalization: Consider adding personal touches or custom storage solutions to make the space uniquely yours.
Efficient organization of your tying area is crucial for a productive and enjoyable fly tying experience. As you establish a well-organized workspace, the next critical aspect to consider is the lighting and magnification options for your tying area.
Lighting and Magnification Options
Selecting appropriate lighting and magnification options is crucial for creating an optimal fly tying workspace. Adjustable lamps and portable magnifiers are essential tools for enhancing visibility and precision while tying flies. Adjustable lamps with flexible arms and brightness settings allow for directing light exactly where it is needed, reducing eye strain and providing consistent illumination. Portable magnifiers, such as clip-on magnifying lenses or magnifying glasses with adjustable stands, can aid in tying small and intricate fly patterns with ease.
In addition to artificial lighting and magnification options, natural light can also be beneficial for a fly tying workspace. Positioning the workspace near a window or using adjustable stands to place the fly tying area in natural light can help reduce the need for artificial lighting and provide a more comfortable tying environment.
Personalizing Your Workspace
Let’s explore how to make your fly tying workspace uniquely yours.
We’ll discuss custom tool storage options to keep your tools organized and easily accessible.
Additionally, we’ll look at personalized workbench setups and creative fly display ideas to add a personal touch to your workspace.
Custom Tool Storage Options
When customizing your fly tying workspace, it’s important to invest in storage options that cater to your specific needs and preferences. Consider these custom tool storage options to personalize your workspace:
-
Magnetic Strip: Utilize a magnetic strip to keep your metal tools organized and within easy reach.
-
Pegboard Storage: Install a pegboard for versatile and customizable storage of tools, materials, and accessories.
-
Customized Tool Racks: Create or purchase customized tool racks to neatly store specific tools such as scissors, bobbins, and whip finishers.
-
Drawer Inserts: Use drawer inserts to keep small items like beads, hooks, and cones neatly organized and easily accessible.
-
Wall-mounted Shelves: Install wall-mounted shelves for storing larger items such as containers of feathers, fur, and other bulk materials.
These storage options can help streamline your fly tying workspace and make your tools and materials readily accessible.
Personalized Workbench Setup
One must carefully consider the layout and organization of their workbench to create a personalized fly tying workspace that meets their specific needs and preferences. Custom lighting and creative organization are essential elements in personalizing a workbench setup. Custom lighting options, such as adjustable LED lamps or task lighting, can be integrated to ensure proper illumination for intricate fly tying. Creative organization, including the use of pegboards, shelves, and drawers, allows for easy access to tools and materials while keeping the workspace tidy. Consider the following table for personalized workbench setup inspiration:
| Custom Lighting | Creative Organization |
|---|---|
| Adjustable LED lamps | Pegboards |
| Task lighting | Shelves |
| Overhead lighting | Drawers |
Creative Fly Display Ideas
Continuing from the personalized workbench setup, a well-organized and visually appealing display of completed flies can further enhance the personalized fly tying workspace. Consider the following creative storage and display ideas to personalize your fly tying area:
-
Shadow Box Displays: Showcase your favorite flies in a shadow box for a visually striking presentation.
-
Repurposed Vintage Trays: Utilize vintage trays as a unique way to display your fly collection.
-
Magnetic Fly Panels: Create a magnetic display panel to easily swap out and showcase your latest creations.
-
Fly-tying Desk Diorama: Design a small diorama on your desk to display flies in a natural setting.
-
DIY Fly Racks: Construct your own fly racks using innovative materials for a personalized touch to your workspace.
Frequently Asked Questions
How Can I Incorporate My Own Personal Style and Aesthetic Into My Fly Tying Workspace?
To infuse personal style and aesthetic into a workspace, consider customizing furniture, using creative storage solutions, and designing a functional layout. Personalizing decor with meaningful items can further enhance the ambiance.
What Are Some Creative Ways to Repurpose Everyday Items for Fly Tying Storage and Organization?
In the pursuit of efficient and creative organization, repurposed containers and DIY organizers offer innovative solutions for storage. Upcycling everyday items into functional storage units showcases resourcefulness and ingenuity in crafting a well-organized fly tying workspace.
Are There Any Tips for Maintaining a Clutter-Free Workspace While Actively Tying Flies?
Maintaining focus and minimizing distractions in a fly tying workspace is crucial. An ergonomic setup, effective time management, and creative expression are key. DIY storage solutions help keep the area clutter-free, promoting efficiency and productivity.
How Can I Best Utilize Natural Light in My Fly Tying Workspace Without Causing Glare or Eye Strain?
Ironically, the quest for natural light in a fly tying workspace can lead to glare and eye strain. To mitigate this, consider adjustable blinds, diffusers, and task lighting. Position your workspace perpendicular to the light source for optimal illumination and reduced eye strain.
What Are Some Ways to Incorporate Technology, Such as Video Tutorials or Digital Patterns, Into My Fly Tying Setup?
Incorporating digital learning and interactive tools can enhance your fly tying setup. Utilize video tutorials and digital patterns for efficient learning. Engage in virtual collaboration and leverage online resources to expand your skills and techniques.
Conclusion
In conclusion, creating a comfortable and efficient fly tying workspace is crucial for optimal productivity and enjoyment. By carefully selecting the location and essential tools, implementing effective storage solutions, and organizing the tying area, one can create a personalized and ergonomic workspace.
Additionally, considering lighting and magnification options can further enhance the tying experience.
Overall, creating a personalized workspace can greatly enhance the fly tying experience and make it more enjoyable.
